Laser cutters are an awesome category of tools but they're very expensive and also tend to be quite bulky. I'm planning to design and build my own on a budget of $1500 with future plans to add 3D printing and PCB milling, all on the same motion platform. As this is a fairly large undertaking, I've divided this project up into several major phases:
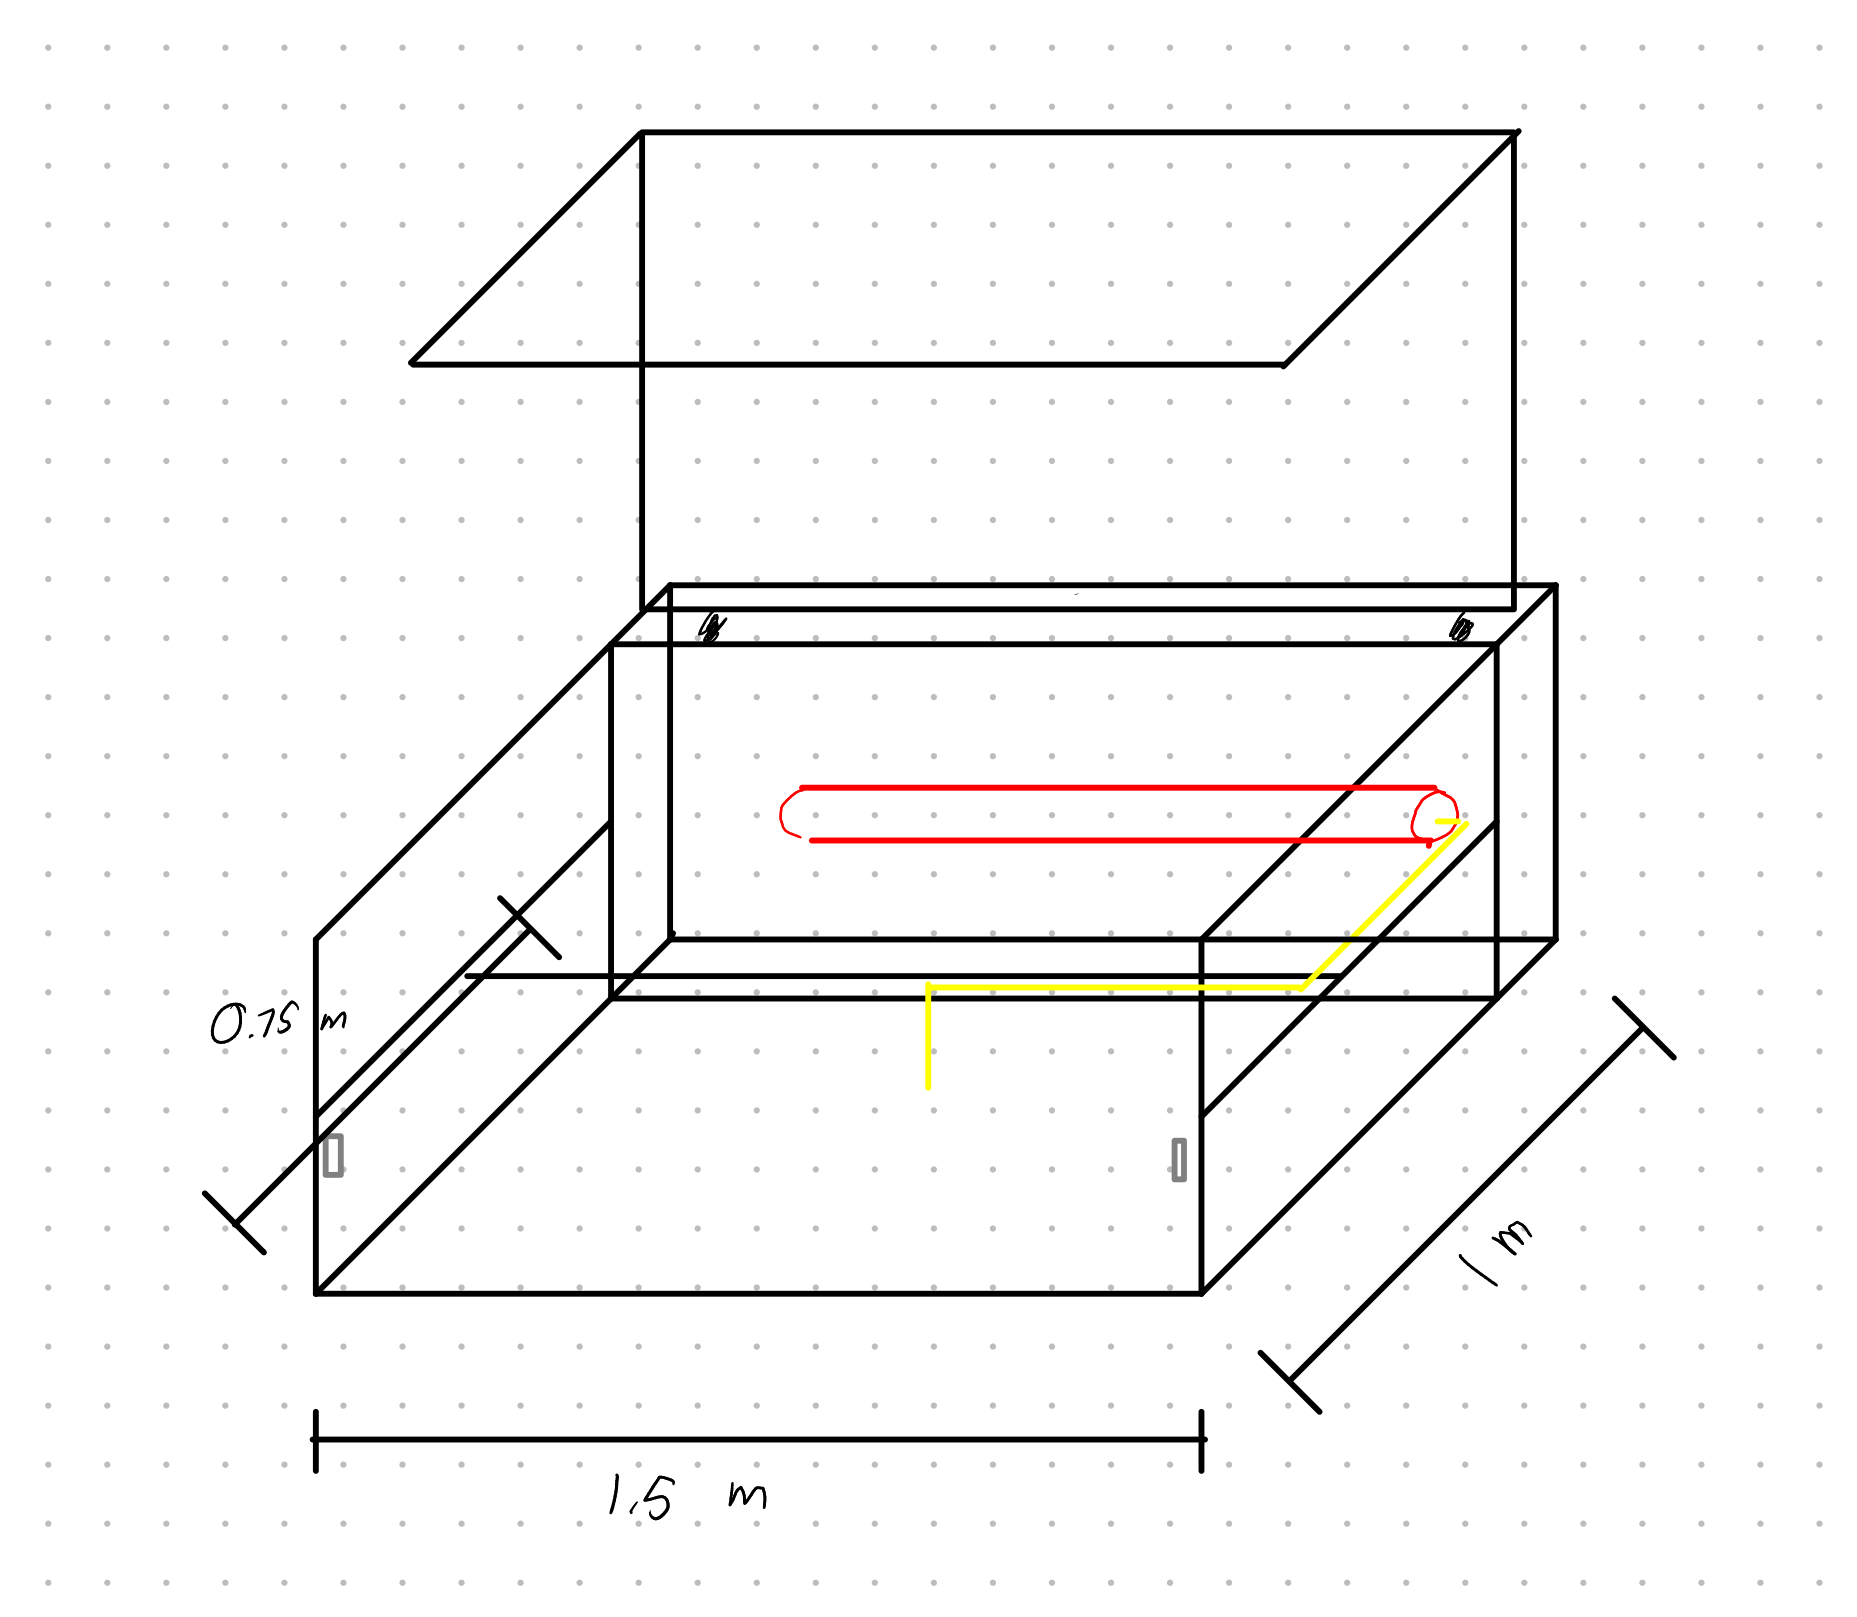
One of the main design objectives for my laser cutter was a compact frame. I wanted the entire unit to be roughly benchtop sized as opposed to the freestanding form factor more common in commercial units. The lower limit on the size of the device is determined by the length of the laser tube inside the device. For my build I am targeting a 40 Watt laser beam. Laser tubes in this power level tend to be around 45 cm is length. Based on this size I decided on a working area of 100 by 50 cm. There is an additional area 25 cm deep behind the working area that will house the laser tube, cooling system, power supply and other utility components.
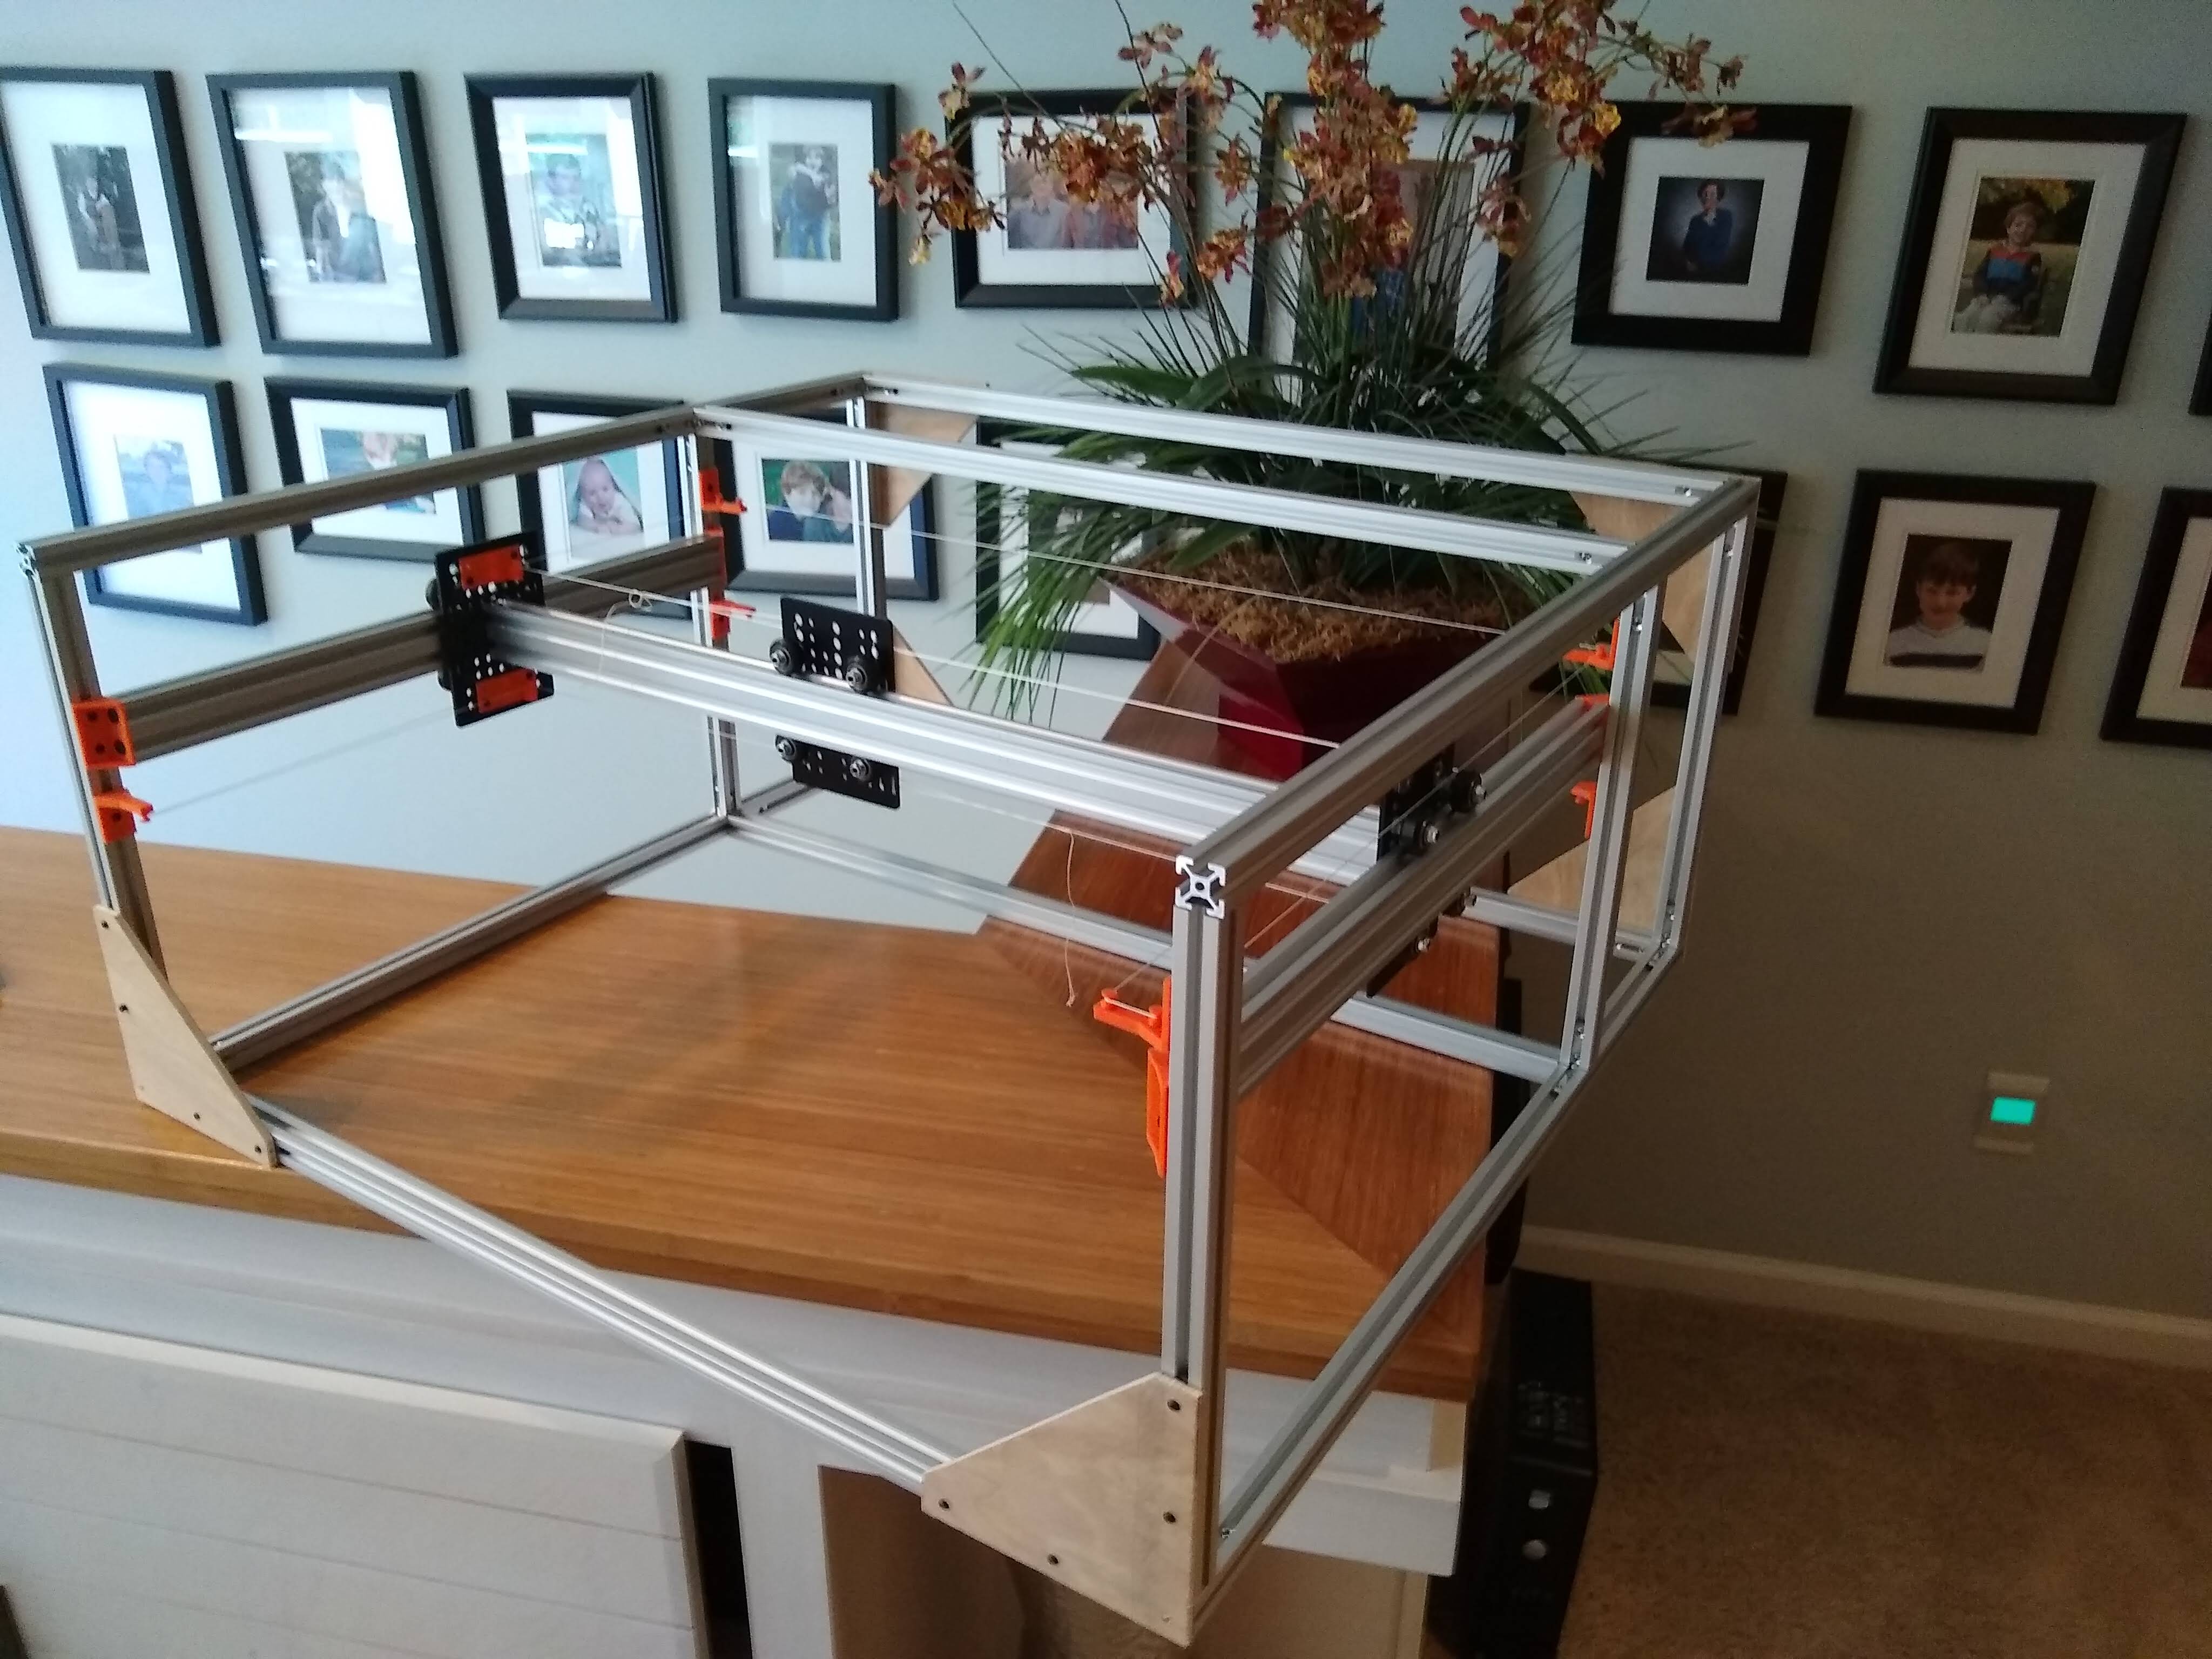
I chose to use aluminum extrusion for the frame due to its low cost, high strength, and ease of attaching additional components. For the majority of the frame I used standard 20x20 aluminum extrusion from Misumi Industrial Supply. In addition to the aluminum extrusion sourced from Misumi I sourced aditional aluminum extrusion and mechanical components from Open Builds. The aluminum extrusion from Open Builds is fully compatible with standard 20x20 aluminum extrusion but comes with a slightly modified profile that allows it to be used as a linear rail. I cut some braces out of plywood and 3D printed some additional brackets. Assembly was fairly straightforward and this was the end result:
The head is mounted on a Core-XY two axis motion platform. Over the past few years the low cost of 3D printer components has resulted in a wealth of experimentation. I was drawn to the Core-XY motion system for a few key reasons. One of the primary advantages is that it can be implemented with only two motors without having to run a shaft across the width of the machine keeping costs down and machine design simple. It can also be implemented with relatively simple and inexpensive belts. Another aspect that I liked is that with a Core-XY system, it is possible to not have a shaft across the front of the machine which makes it easy to insert and remove material. The primary downside of the Core-XY motion platform is the unusual kinematics. Movement of a single motor will actually move the head in a diagonal direction.
One of the more unconventional choices that I've made with this design is to eschew stepper motors which are near universal in hobbyist designs. I am using two DC hobby aircraft prop motors linked to the ODrive motor controller. The ODrive uses rotary encoders to control commodity-grade hobby brushless motors. The advantages of this system are extremely high speed and continuous positional feedback eliminating the scourge of missed steps. In order to power this setup I am planning to use a 1000 Watt ATX power supply that I salvaged from a Dell workstation PC.
One of the disadvantages of the ODrive is that I requires calibration for your specific set of motors and the attached mechanical system. I initially had some trouble with the motor sticking at various "cogging points". I ended up resolving this issue by building a flywheel out of large washers and mounting it directly to the motor shafts.
As stated before the linear axises are driven by belts I used a variety of 3D printed brackets and pulleys from Open Builds. The Brackets at the back of the machine incorporate a simple tension adjustment mechanism.
For this project I am planning to embark on the ambitious task of writing my own CNC firmware. Although there are many potentially suitable 3D printer firmwares that I could utilize, I have decided to develop my own. Two key deficiencies in existing CNC firmwares are lack of first-class support for the ODrive and support for the flexible, multi-function device that I have planned.
For a controller board I am planning to use an Adafruit PyGamer. This board is intended to be sort of an open source "Game Boy" type device, but I see all of the elements of an ideal CNC controller. The PyGamer includes a screen, buttons, a two axis joystick, SD card slot, a buzzer, and one of the fastest processors that is supported by an Arduino Core with its wealth of libraries and community support.
The core of the system is of course the CO2 Laser tube. Using a array of mirrors the laser beam will be directed to the cutting head. The laser tube will require water cooling in order to dissipate the large amount of heat generated. I think that I will be able to use PC watercooling gear for this task. In order for the system to be safe to use indoors the system will also need an air filtration system to filter the exhaust produced by the laser cutting process.
For this system to be safe it will need to be fully enclosed and include safety interlock switches to prevent the lid being opened during operation. When the laser beam strikes material it can reflect in any direction and can cause eyesight damage. Util the system is fully enclosed I will need to wear protective eyewear whenever the machine is operating. The good news is that most of this energy is within the infrared spectrum and that most materials that are transparent to visible light will still protect you from scattered CO2 laser beam. I plan to fully enclose the machine using polycarbonate panels and sheet metal.